Underpainting Makeup: The Viral Technique for Natural-Looking Sculpted Features
If you were to walk into a bathroom midway through this specific makeup application process, you might experience a moment of sheer terror. The sight involves stark, dark stripes of contour, vivid spots of blush, and unblended concealer that appears more like a geometric art project than a beauty routine. However, this initial stage is precisely where the magic begins to unfold.
The Transformation from Chaos to Perfection
A sheer layer of foundation is applied on top of those seemingly harsh lines, and suddenly, they vanish. In their place, cheekbones emerge looking naturally sculpted, and a healthy flush appears to radiate from within the skin rather than sitting awkwardly on its surface. This is the captivating world of Underpainting. While it is currently enjoying a massive viral moment across social media platforms, this is not some fleeting, new trend. Underpainting is a classic, time-tested technique that professional makeup artists have utilized for decades to achieve that elusive, coveted "model off-duty" aesthetic.
Flipping the Traditional Makeup Script
Most individuals were taught a very specific, sequential order for applying makeup: foundation first to create a blank, even canvas, followed by contour, bronzer, and blush. The inherent problem with this traditional method is that layering colored cosmetic products on top of a base can sometimes result in a heavy, cakey, or overly obvious appearance, particularly under harsh lighting conditions.

Underpainting completely reverses this conventional approach. You apply your contour, bronzer, and blush before your foundation. The underlying logic is simple yet remarkably effective: by positioning the foundational "bones" or structure of the makeup underneath, the subsequent layer of foundation acts as a sophisticated diffuser. It softens harsh edges and masterfully mimics how natural shadows and subtle colors naturally appear on a human face—emanating from beneath the skin's surface.
The "Trust the Process" Underpainting Routine
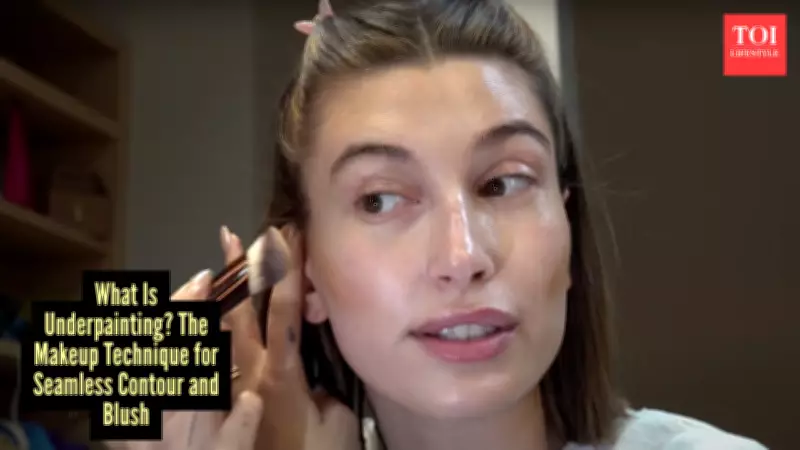
The essential key to successfully mastering this look is straightforward: do not panic. During the initial stage, you are intentionally going to look a little unconventional. Begin with serious, thorough skin preparation. You require a well-hydrated, slippery base so that all products glide smoothly across the skin rather than dragging.
- Once properly primed, proceed with your contour cream or liquid. Apply it strategically to the hollows of your cheeks, along the temples, and the jawline. Research and expert advice suggest you can actually afford to be slightly heavy-handed at this stage because the foundation applied later will significantly mute and soften the color intensity.
- Next, target the apples of your cheeks with your chosen blush product. Apply concealer to the high points of your face, such as under the eyes and the center of the forehead.
- Give all these products a preliminary, rough blend—it does not need to be perfectly seamless yet—and then prepare for the final, absolutely crucial step.
The Crucial Foundation Filter Application
This step is where the entire underpainting technique either succeeds brilliantly or fails completely. You cannot simply smear a heavy, matte, full-coverage foundation over your meticulous work, or you will completely obscure it. What you need is a sheer-to-medium coverage liquid foundation or a lightweight skin tint.
Using a damp beauty sponge or a very fluffy brush, you must stipple—meaning tap—the foundation gently over your entire face. This application method is absolutely non-negotiable. If you swipe or drag the brush, you will inevitably muddy the carefully placed colors underneath and ruin their precise placement. The tapping motion gently pushes the foundation over the contour and blush, creating that highly desired filtered, soft-focus finish that looks incredibly natural.
The Golden Rules for Successful Underpainting
Before you attempt this technique during your morning routine, keep two major rules firmly in mind to avoid creating a muddy, patchy mess.

- First, product texture is paramount. This technique relies almost entirely on creams and liquid formulations. Powder products are considered the enemy of underpainting; they do not blend well underneath liquid foundation and will turn patchy and uneven almost instantly. Reserve your powder products strictly for the very end of your routine, and even then, use them sparingly, perhaps just to lightly set the T-zone.
- Second, always prioritize sheerness. If your absolute favorite foundation is a full-coverage formula, do not feel compelled to discard it. Simply mix a small amount with a little moisturizer or primer on the back of your hand to thin out the pigment concentration before applying it over your underpainting work.
Underpainting might add an extra minute or two to your morning beauty regimen, but the visual payoff is substantial: seamless, dimensional definition that genuinely looks like naturally great skin, not like heavily applied makeup. The most important mantra to remember is to simply trust the transformative process from start to finish.