How to Graft Plants at Home: A Beginner's Step-by-Step Guide
Grafting stands as one of the most fascinating and rewarding practices in gardening, enabling enthusiasts to merge two distinct plants into a single, unified organism. While it may appear complex at first glance, this technique is entirely accessible for home gardeners of all skill levels. Typically employed to cultivate fruit with enhanced qualities, boost a plant's resilience to diseases, or grow multiple varieties on a single tree, grafting opens up a world of horticultural possibilities. This comprehensive guide will walk you through the process to ensure successful grafting in your own garden.
Understanding the Basics of Grafting
To achieve successful grafting, it's essential to grasp the fundamental principles behind the process. At its core, grafting involves uniting two plant parts: the rootstock, which forms the lower section with a robust root system, and the scion, a cutting from the desired plant you wish to propagate. These components fuse together over time, creating a single, cohesive plant. A critical factor for success is plant compatibility; only species that are closely related can be effectively joined. This biological similarity ensures proper vascular connection and growth.
Selecting Healthy Plants and Gathering Tools
Choosing the right plants is a pivotal step in the grafting process. Opt for a healthy rootstock with a well-developed root system and a scion that is disease-free and freshly cut. In addition to the plants, you'll need a few essential tools:

- A sharp knife or blade for precise cuts
- Grafting tape or similar binding material
- Sealing wax (optional, for added protection)
Maintaining cleanliness with your equipment and preparing the plants properly will streamline the procedure and enhance your chances of success.
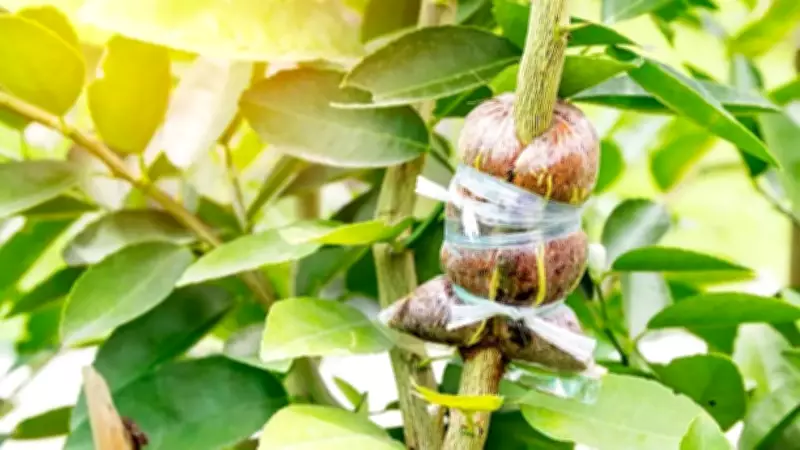
Making Clean Cuts to Unite the Plants
Executing clean, accurate cuts is paramount for successful grafting. Begin by trimming the top portion of the rootstock to create a smooth surface. Next, make a corresponding cut at the base of the scion. The goal is to align the cambium layers—the thin, growth-promoting tissues—of both plants. When these layers are in direct contact, place the scion onto the prepared rootstock. Proper cuts facilitate better bonding and nutrient exchange between the two parts.
Binding and Protecting the Graft
Once the plants are united, secure them tightly using grafting tape or another suitable binding material. This binding prevents the scion from drying out and holds the pieces firmly in place. For additional protection, you can apply sealing wax over the cut areas. After completing the graft, position the new plant in a cool, sheltered location away from wind and direct sunlight. This protective environment is crucial for the initial healing and fusion phase.
Monitoring Plant Development Post-Grafting
Although the main grafting process is complete, ongoing care is essential. Within a few weeks, look for signs of growth, such as green shoots emerging from the scion. At this stage, remove any shoots that appear on the rootstock to direct energy toward the grafted section. Ensure the plant receives adequate water and light as it establishes itself. Regular monitoring helps address any issues early and supports healthy development.
By following these steps, even beginners can master the art of grafting, transforming their home gardens with improved plant varieties and resilience. Embrace this technique to explore new dimensions in gardening and enjoy the fruits of your labor.