
Why Homemade Khasta Kachori Becomes Soft After a Few Hours: 4 Halwai-Approved Smart Tips to Make Them Perfect at Home
Whether it is scorching summer or chilling winter, the craving for piping hot khasta kachori at the local sweets and snack shop is unimaginable. The aroma of freshly fried kachori filled with dried and spiced dal, the bubbles of boiling oil, and then the golden discs creating the perfect sound in the big basket, which is broken smartly, releasing a flash of steam. All of this just makes the magic of khasta kachori surreal. But, when we try replicating it at home, everything falls apart. From the crispy sound to the flaky texture, everything seems to be messed up. If you also face this, this piece of information is for you. When we asked many home cooks about the problem they face while replicating khasta kachori at home, they all had a common frustration: the kachoris turn soft just a few hours after frying. If you have ever wondered why this happens, the answer lies in a mix of moisture, frying technique, and storage habits. Scroll down to find the solution.
Why Khasta Kachori Turns Soft
According to Raju, a local halwai of Noida, one of the main reasons kachoris lose their crunch is trapped steam. When the freshly fried kachoris are stored while they are still warm, the heat inside releases steam, which softens the outer crust. Another reason is frying at the wrong temperature. If the oil is too hot, the outer layer cooks too fast and turns golden, while the inside remains undercooked. This results in a crust that looks perfect but lacks the structure to stay crispy for long. Also, as per the halwai, moisture is another culprit. If the dough is too soft or the filling contains excess water, it can make the kachoris lose their signature crispy texture.
Tip 1: Prepare the Right Dough
The art of making perfect khasta kachori begins with kneading the right dough. According to Raju, a proper khasta kachori dough should be stiff and well-balanced with fat, often referred to as moyan. The process begins with mixing oil or ghee thoroughly into the flour before adding water. Once the flour starts binding well, only then should water be added. This step helps create the flaky layers. Make sure the dough is not as soft as roti dough; instead, it should feel firm and slightly tight. This consistency will help retain the shape of the kachori and develop a crisp outer shell during frying.

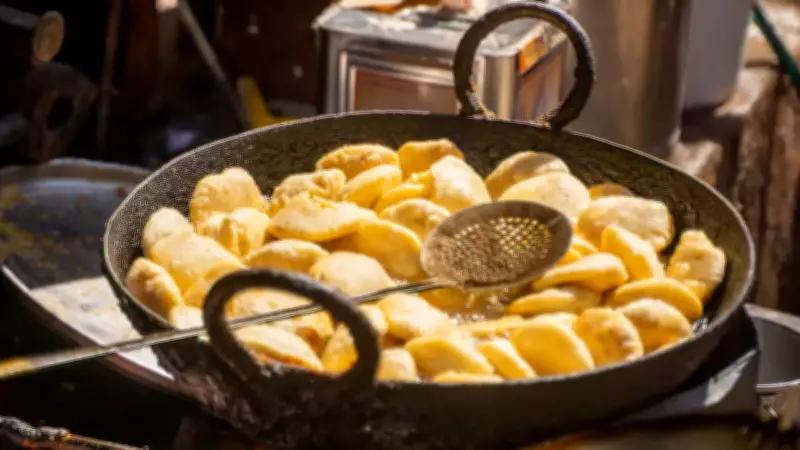
Tip 2: Frying on Low to Medium Heat
Raju says that frying kachori is an art of patience. If you fry it in a rush, the dish will be spoiled. He says, Start by placing them in medium-hot oil, then immediately reduce the heat to low or medium-low. He adds, Slow frying helps the crust to cook evenly from the inside out, giving it a stable and crunchy texture.
Tip 3: Pay Attention to Filling
The filling also plays a key role in maintaining crispness, affirms Raju. Whether you are using spiced lentils, peas, or other ingredients, it is important to cook the mixture until all moisture evaporates. Also, allow the filling to cool down completely. Using warm or wet filling can release steam inside the kachori, which eventually softens the crust.
Tip 4: Cool and Store Well
With kachoris, cooking and after-cooking treatment are equally important, concludes Raju. He adds, After frying, place the kachoris on a wire rack instead of a plate. This allows air to circulate and prevents steam from getting trapped underneath. Once they cool down to room temperature, avoid sealing them in a fully airtight container right away. It is important to keep the kachoris slightly ventilated to maintain their crispness.

